Pages

Friday 7 November 2014

Engraved Volcanic Pistol - Formative

A school formative where we have to model a realistic gun. 
Poly count = 2.1k.

Renders:


Wireframe:


Tuesday 28 October 2014

Reaper Medic - Character Summative Update


Having failed my first submission (didn't finish on time), the character re-submission date was given on Monday 20th of October. Time to get this character done!

Textures:


Normal Map:

  • Baked with xNormal.
  • Gave me the most trouble, had to bake my character in groups of components to prevent overlapping and cage problems.
  • Still ended up with a few normal issues, though not very noticeable.
  • The Jetpack normals look quite bad, the first part of the character I would fix if I had extra time.
Occlusion Map:
  • Baked with xNormal, along with normals.
  • Has same issues as the normal map.
Diffuse Map:
  • Polypainted on my high poly mesh in ZBrush.
  • Baked vertex colours in xNormal onto the low poly mesh.
  • Had issues, such as colours baked on random pieces, but managed to clean up most of them in Photoshop.
  • Would have liked to hand-paint a bit more as it looks rather flat.
Specular Map:
  • Generated using dDo. Ran out of time to hand paint my own.
  • Works alright, but would have preferred to alter the skin and hair speculars to look more realistic.
  • The scraped paint look might have turned out too strong.
Emission Map:
  • Created an emission map to create light glows from the cyan colour in the armor, the liquid in the needles, and the red crosses.
  • Looks decent when rendered in Marmoset 2. The red cross on the back looks a bit too bright perhaps.


Level of Details


  • The LODs needed (with poly limits) are LOD 0 - 15k , LOD 1 - 7k, and LOD 2 - 1k.
  • Created LOD 1 with the aid of the reduce tool in Maya 2014. Worked well enough.
  • LOD 2 was a disaster. Trying to reduce my model down to 1k poly was near impossible. The result was a complete mess of barely recognizable shapes, and the model looked quite frightening to be honest. 


Renders (LOD 0):


Monday 6 October 2014

Character Project


Moodboard


This is the first summative where we will be creating a whole character from scratch.

I will be creating a medic with a jet-pack, with her space armour a fuse between that of a medic and a reaper.

Orthographic concept

Started modelling in Zbrush using the orthographic as reference:


Sunday 8 June 2014

Formative - Rock Sculpting in ZBrush

High Poly


First time sculpting rocks in ZBrush. I followed a few references and tutorials, and experimented with different brushes.

Result in the picture is a few hours of playing around with brushes and alpha and about 2 hours of actual sculpting.

I started out with Zspheres, built up the base and used Move brush to form the shape. I then used the Planar brush in combination with a messy alpha to draw out the hard edges forming the chunks of rock. Bit of smoothing, Dam Standard, and regular Planar to clean up, as well as playing around with the rock brushes I got from class.

I worry I might have bit off more than I can chew for the texturing, as I plan to do a hand painted stylised texture.

LOD and Texture (First Submission)

These are the LOD and textures I had for the submission of this formative, which took me by surprise as I didn't read deadline on the formative brief properly. I was planning on having my hand painted diffuse done by this afternoon, but the formative was due first thing in the morning.

This LOD is at 600 Polys.


Diffuse, Normal, Specular, Occlusion

The SketchFab model currently has some issues with normals/occlusions that causes some black patches.


Friday 6 June 2014

GA2A01 - Weapon Summative

It's been a while since I've last made a new post, mostly due to laziness and procrastination, an evil habit I know...

This was our first modelling Summative for the year. We had 4 weeks to model and texture a weapon of our choice, only requirement for the weapon being it had to shoot in some way. I was ill for the first two weeks, once cold and once flu, managed to get a week extension to make up some lost time.

I chose to make a crossbow, because crossbows are cool.
Nothing more to be added.

References:


I decided to go with something Steampunk, but I would've also liked to make a Cyberpunk or Magical crossbow.

Concepts:


High Poly

I decided to jump straight into Zbrush without building a base mesh in Maya/Max to learn more on using the program, and as a way to push myself.

I started out with Shadowbox, using the concept image as my reference and loaded onto each orthographic view of the Shadowbox so I can "trace" the basic shape.

I used clip curve tool to clean up the edges, panel loop to create all the metal bits on each piece, alphas for the screws, and a custom curved brush for the tubes connecting the canisters to the crossbow.
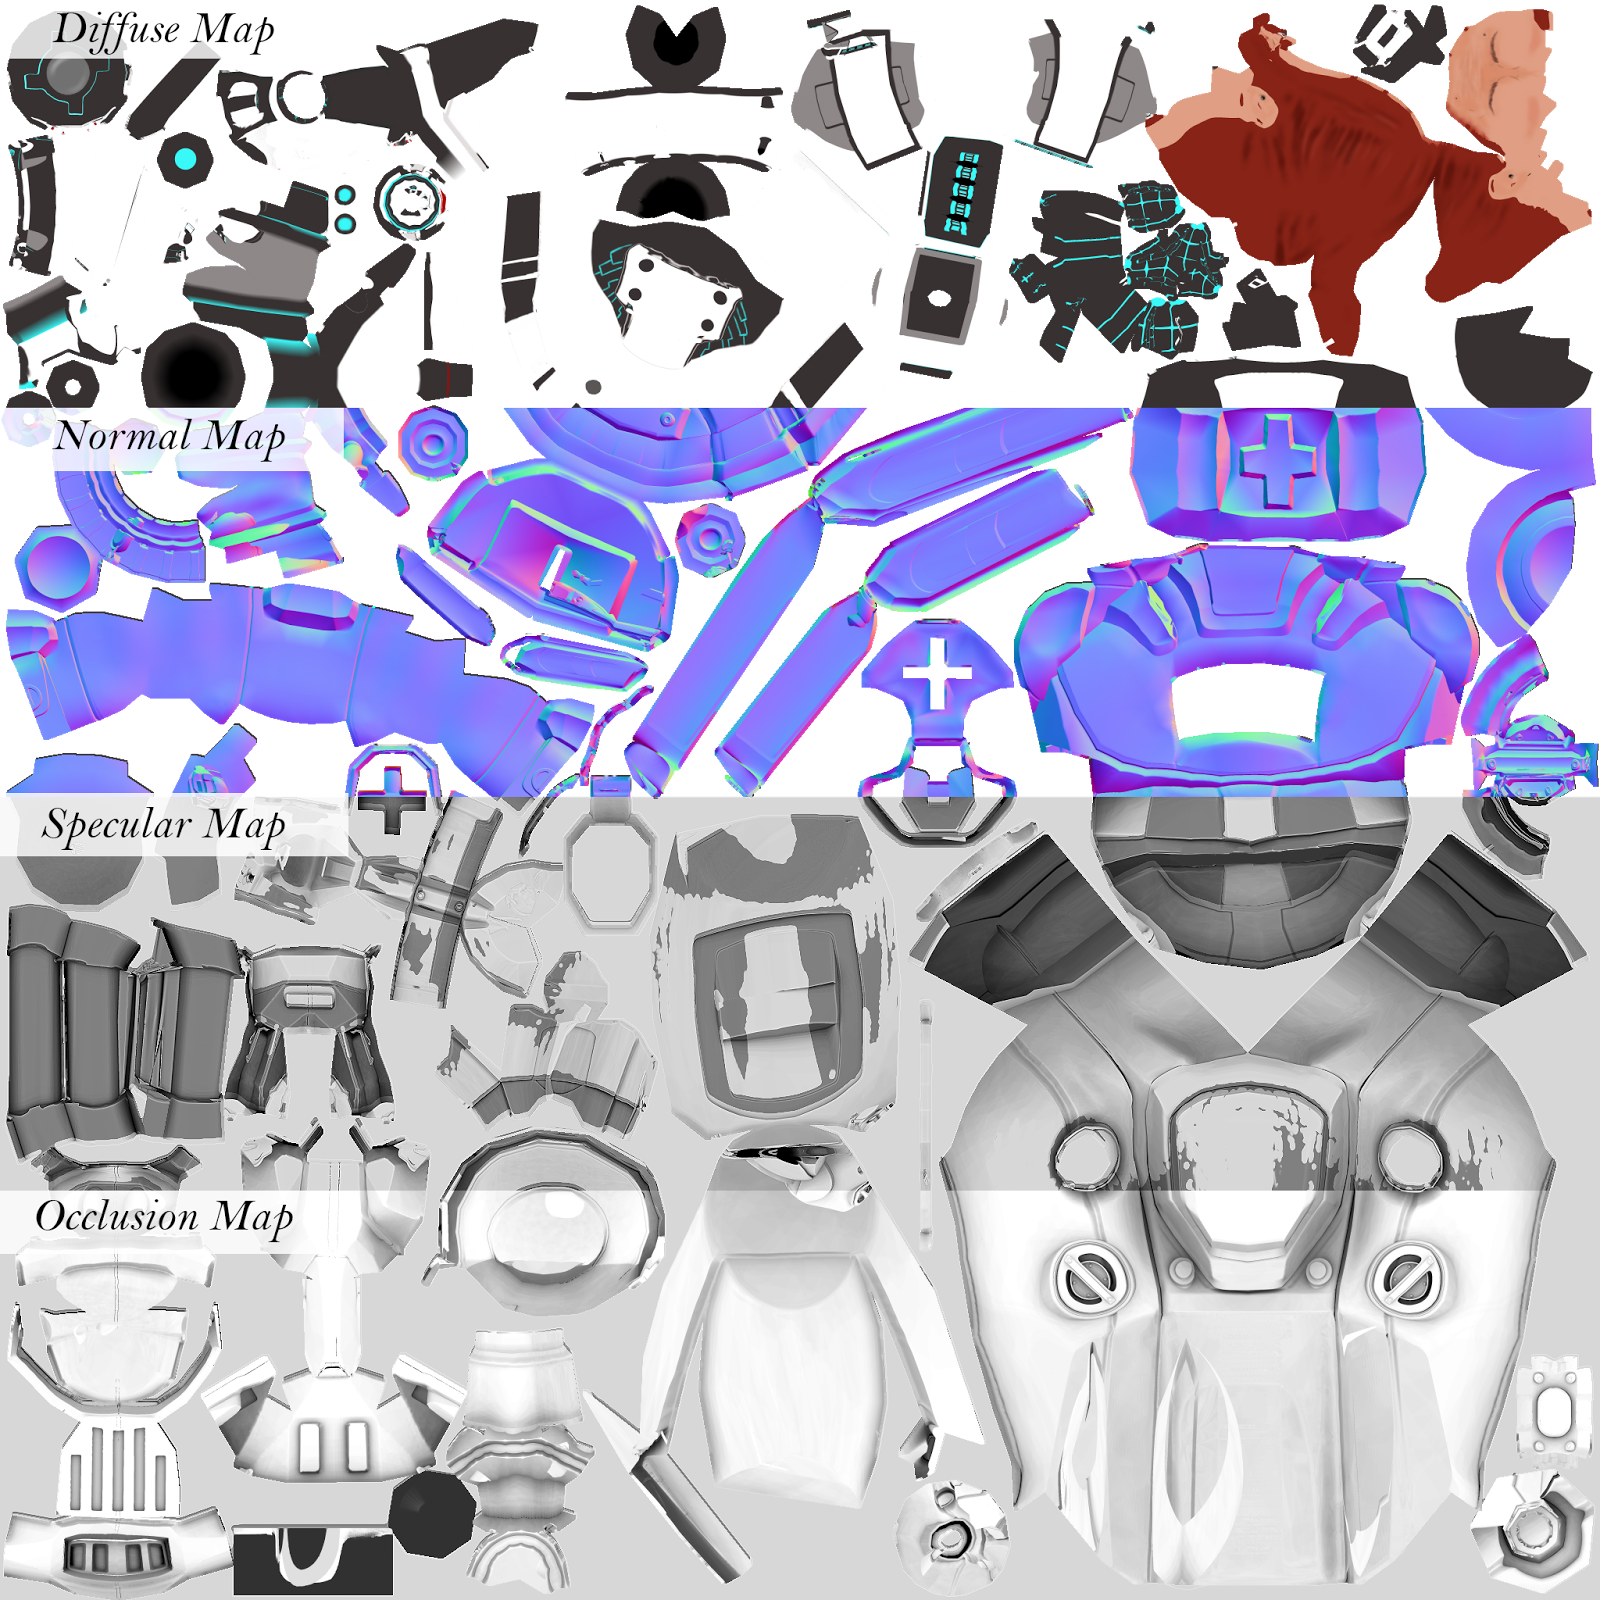


Texturing

Getting my normals and ambient occlusion took a lot longer than I expected. I had 18 separate parts, and for each I made an envelope and baked it in xNormal. I should have asked for help more at this stage to see if there was a more efficient way of baking the weapon.

I decided to go with dDo for my diffuse and specular as I was running out of time. They turned out alright, but I would have preferred to have hand painted textures.

Unfortunately I only noticed at this stage there were a couple UVs that were completely messed up, so there are stretched textures on a few parts of the crossbow.
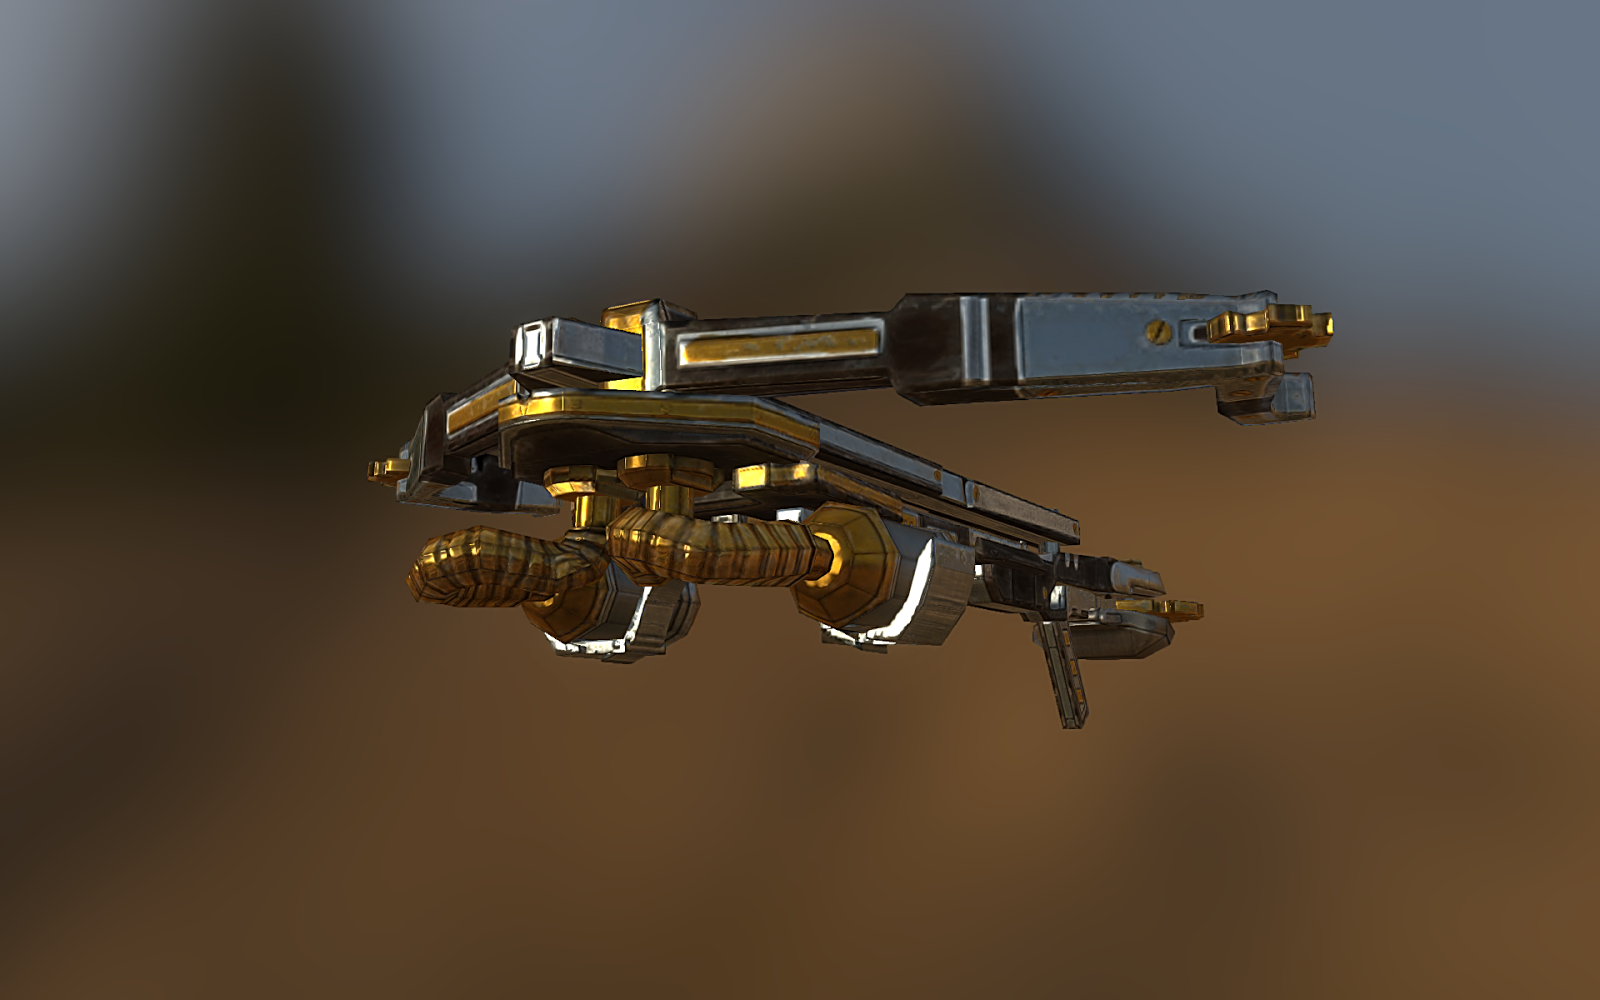


Final Renders


Issues:

  • Edge lines showing. Had to do with the baking process I believe.
  • Bowstring not double-faced.
  • Stretched textures due to messed up UVs.

Friday 21 March 2014

Project GLM Team Modelling - Western Sci Fi Modular Environment

The first modelling assignment of my 2nd year in Media Design School.

5 artists (including myself) banded together for this task (as required), which was to produce modular pieces for a modular environment, similar to the previous post.

Out theme was Western Sci-Fi, and we chose to model a mine, complete with rail tracks and support beams. Our art style was stylized, cartoon-ish, drawing inspiration from games such as the Orcs Must Die series and WildStar.

Concept of room pieces.

Eventually we chose which pieces we wanted to do. I chose the mine rail tracks.
Mine track concept.


Model - work in progress.

Renders and screenshots of the completed straight rail pieces below:

Orthographic top view.

Orthographic side view.

XNormal render 1.

XNormal render 2.

After adding some rust and aging effects with dDo for the first time.
Diffuse Map - I intended to add the curved rail piece and pipe pieces as well, however I did not manage to finish it on time and left them out in the end, thus the poor utilization of texture space.

Specular Map.
 This was the first time I've learned how to make a Specular map correctly, and also the first time I've used an Ambient Occlusion Map.

Ambient Occlusion Map. Never made one before, and this first one was rushed, so I think it turned out very poorly. 

Baking my normal map was troubling. I ran into problems using XNormal, and ended up resorting to using the old Maya transfer maps option. I baked a higher model piece, though the differences are subtle.


Normal Map. Baked from high poly in Maya.